How to Use the Project Reports Generator
Audience: Project managers, team leads, and stakeholders.
Goal: To explain how to generate, customize, and save a wide variety of analytical reports based on live project data.
The Reports generator is your on-demand project analyst. It leverages AI to scan your entire project’s live data, task progress, budget status, risks, and more
and synthesizes it into a professional, narrative report. This tool is essential for understanding project health, identifying issues, and communicating progress to stakeholders.
Step 1: Select Your Report Template
The process begins by choosing the type of analysis you want to perform. The main page presents a comprehensive library of report templates, each designed for a specific analytical purpose.
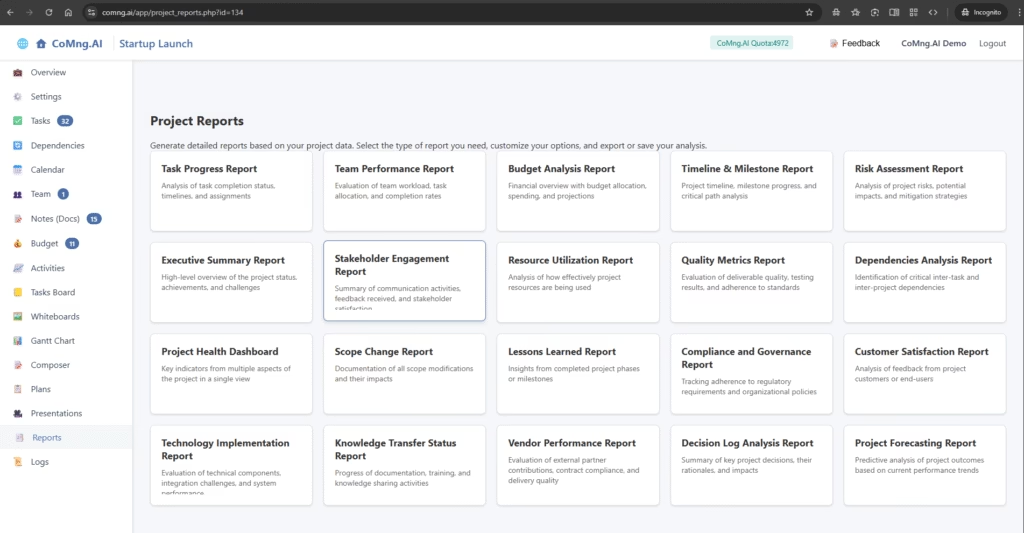
- Browse the available templates, such as the Task Progress Report, Executive Summary Report, or Risk Assessment Report.
- Click on the card that matches the report you need to generate.
Step 2: Configure Your Report Options
After selecting a template (e.g., “Executive Summary Report”), a set of customization options will appear below the template gallery. These options allow you to tailor the report to your exact needs.
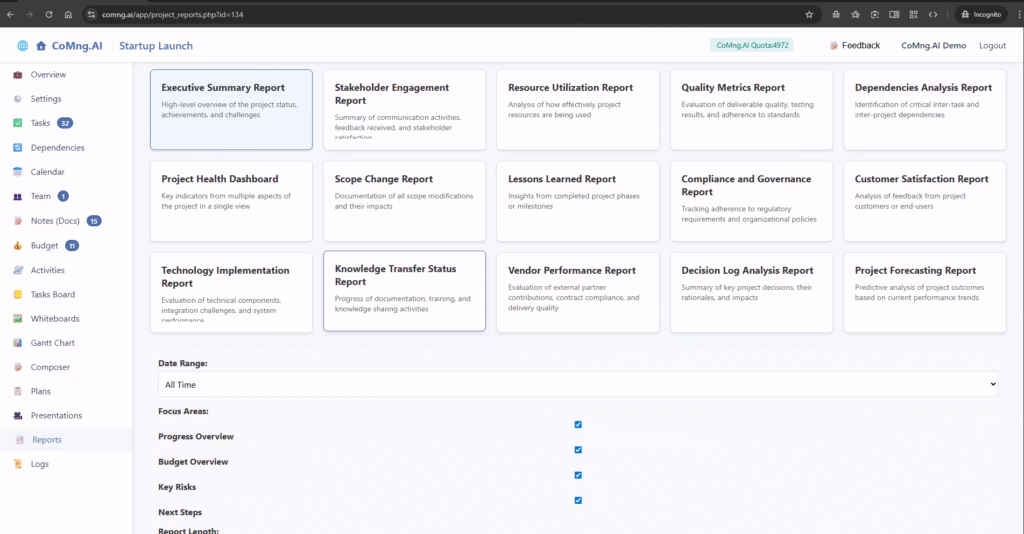
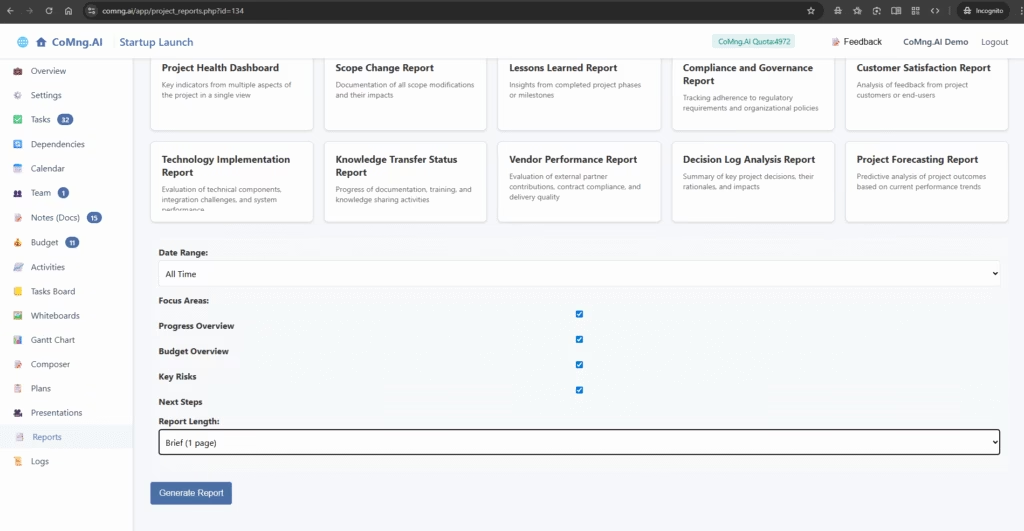
- Date Range: Specify the time period the report should cover. This could be “All Time,” “Last 30 Days,” or another custom range.
- Focus Areas: Use the checkboxes to select which specific sections you want the AI to include in the report. This allows you to include or exclude topics like Budget Overview, Key Risks, or Next Steps.
- Report Length: Choose how detailed you want the report to be, from a Brief (1 page) summary to a more Detailed analysis.
Once you have configured your options, click the blue Generate Report button.
Step 3: Review the AI-Generated Analysis
The AI will now analyze all the relevant data from your project based on your selections and write a complete, narrative report. This isn’t just a data dump; it’s a professionally written document that explains the status, highlights key findings, and provides context.
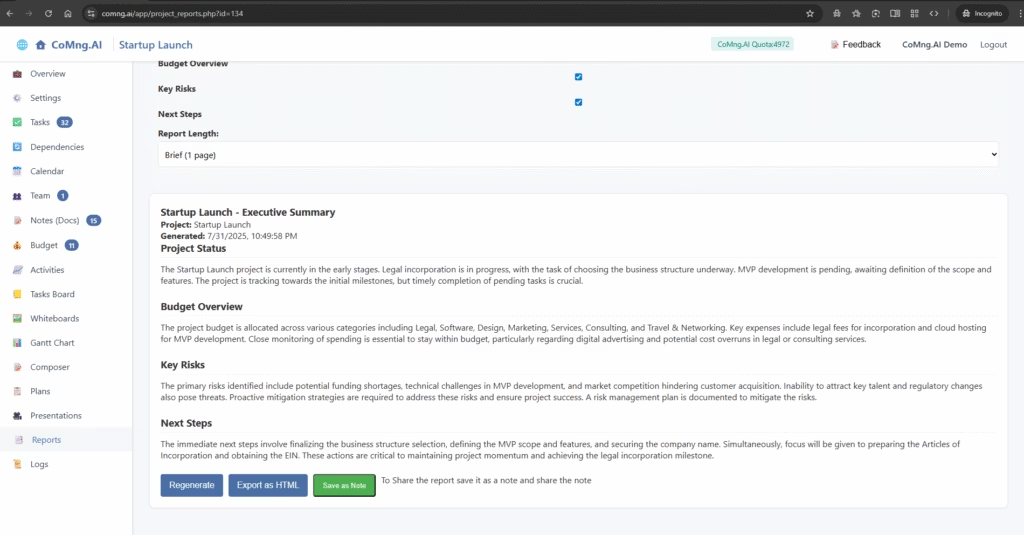
Step 4: Export and Save Your Report
With your report generated, you have several options at the bottom of the page to use and preserve it:
- Regenerate: If the report isn’t quite what you wanted, you can click this to have the AI try again, perhaps after adjusting the focus areas or length.
- Export as HTML: Click this to download a perfectly formatted HTML file of your report. This file is easy to share, print, or archive.
- Save as Note: This is a highly recommended action. Clicking this button creates a permanent, time-stamped copy of the report in your project’s Notes (Docs) section. This is invaluable for tracking project history and for audit purposes.
Leave a Reply