Using the Project Audit Logs for Governance and Security
Audience: Project managers and administrators.
Goal: To explain how to use the Logs page to review a detailed, unchangeable history of all actions taken within a project.
The Logs page is your project’s official and unchangeable history book. It provides a detailed, time-stamped audit trail of every single action performed by any user within the project. This feature is essential for security, accountability, troubleshooting, and understanding the complete history of your project.
1. Understanding the Audit Log View
When you navigate to the Logs page, you will see a chronological list of all recorded actions, with the most recent actions at the top.
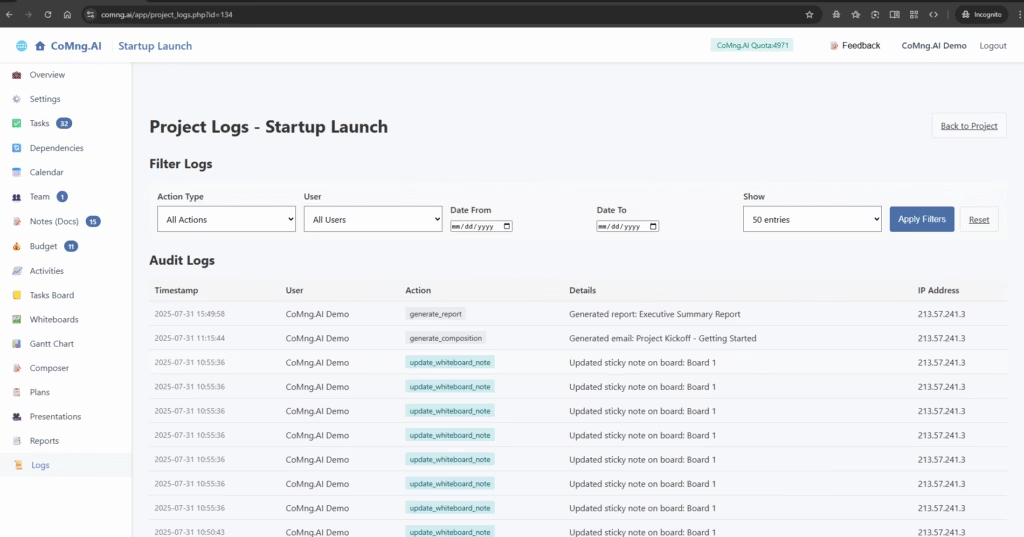
Each entry in the log provides critical information:
- Timestamp: The exact date and time the action occurred.
- User: The name of the user who performed the action.
- Action: The technical name of the action performed (e.g., create_task, generate_report).
- Details: A clear, human-readable description of the action (e.g., “Generated report: Executive Summary Report” or “Updated task status to: In Progress”).
- IP Address: The IP address from which the user performed the action, which is crucial for security audits.
2. How to Filter and Search the Logs
For large and active projects, the log can become very long. Use the powerful filtering tools at the top of the page to find the exact information you need.
- Action Type: Filter the list to show only one type of action (e.g., show only delete_note actions).
- User: Isolate all actions performed by a specific team member.
- Date Range: Use the Date From and Date To fields to narrow your search to a specific time period.
- Entries: Choose how many log entries you want to display per page.
After setting your filter criteria, click the blue Apply Filters button to update the list. To clear your selections and see the full log again, click Reset.
3. Printing Logs for Archiving or Reporting
If you need a physical copy or a PDF of the current log view for a report or for archival purposes, simply scroll to the bottom of the page and click the Print Logs button. This will open your computer’s standard print dialog, allowing you to print the filtered log data.
 Understanding Your Project Overview Dashboard
 Getting Started: Creating Your First Project
") Creating a New Project (Direct Method)
Creating a New Project (Direct Method) Managing Your Project’s Foundation: The Settings Page
 Mastering Task Management